I always like to make one or two Halloween decorations each year, and this year's addition is Goulianna, a 18" wall doll. I thought I would write a little tutorial on how to make this doll to share with all of you.
THE HEAD
MATERIALS:
3" Styrofoam egg
Creative Paperclay, or LaDoll stone clay medium
Acrylic animal eyes
White Gesso medium
Black and white acrylic paint.
black colorred pencil
Matte acrylic spray sealer
++++++++++++++++++++++++++++++++++++++++
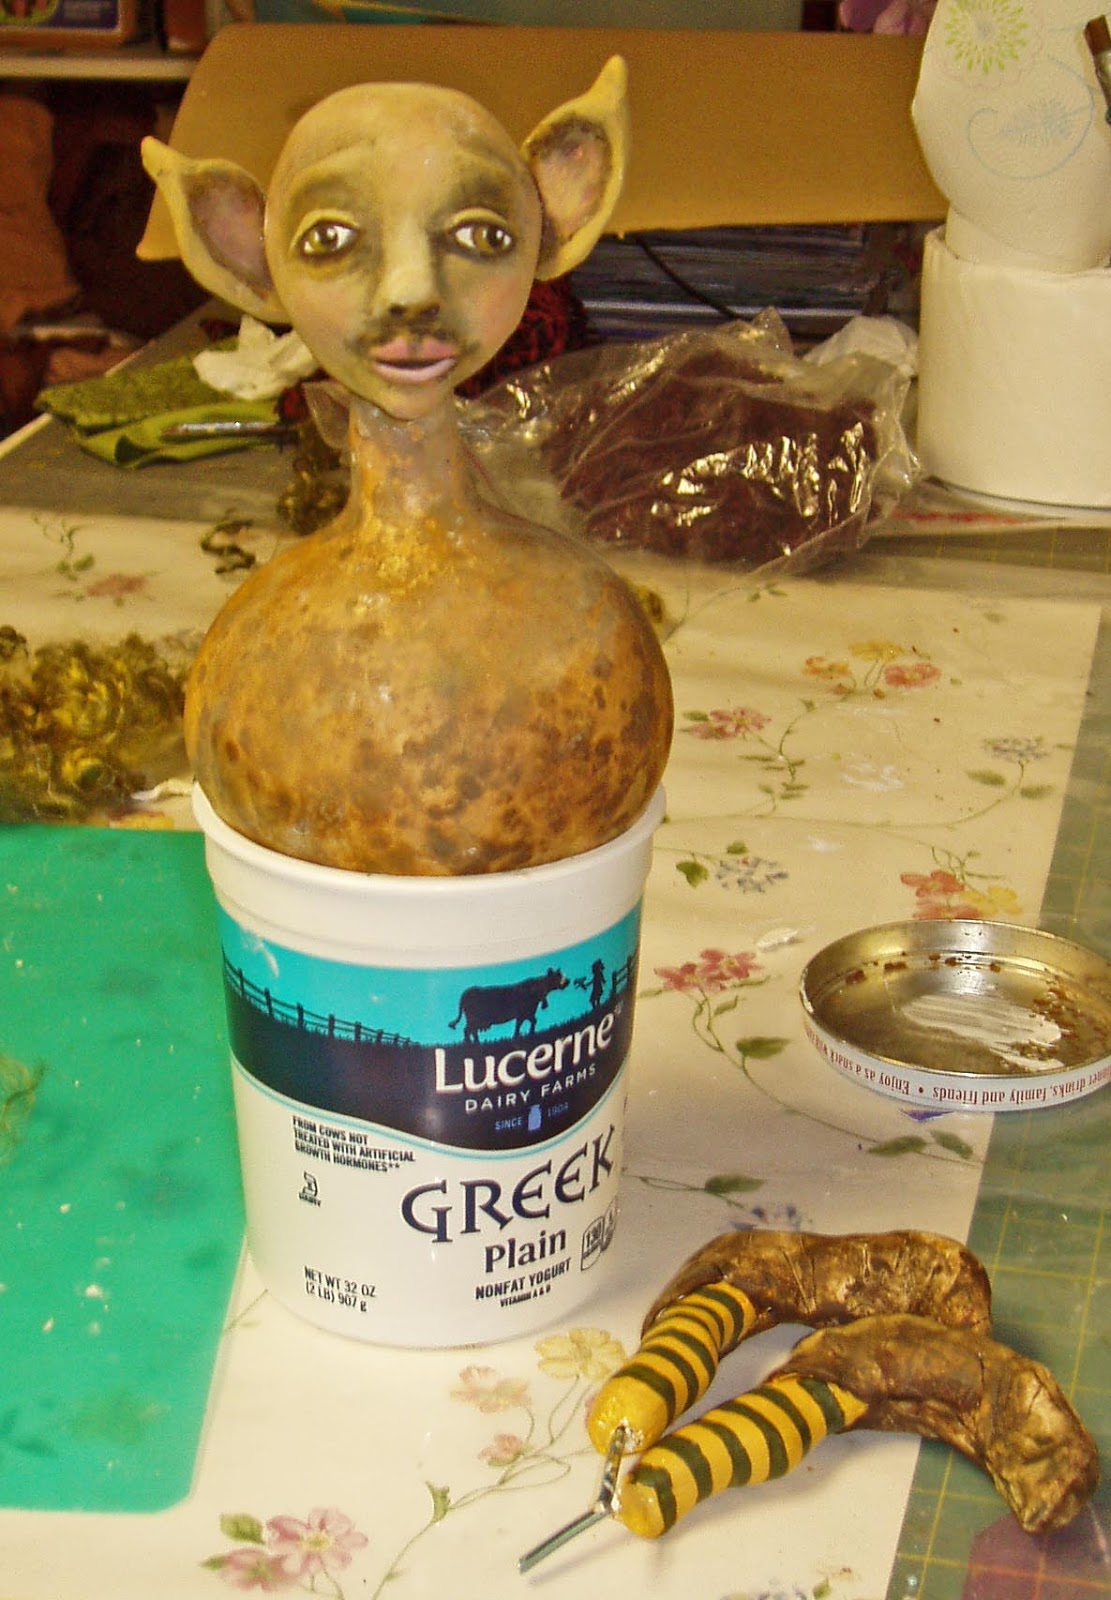
Goulianna's head is created by applying Paperclay over a 3" Styrofoam egg.
 Use a spoon shaped clay tool or end of large paint brush to make downward eye impressions in the Styrofoam egg. Make a depression in the nose bridge between the eyes area as well.
Use paintbrush handle or clay tool to ream out an area at back of head, just above the chin area. The neck tab of the body will be inserted here later.
Roll out a golf ball size piece of the clay on a mat using a clay roller, or the edge of a jar. Roll to about 1/8" thick.
Cover the entire head except the hole in back with the Paperclay. Trim off excess if needed, or add more for coverage. Dip fingers in water to smooth the entire head.
Define the eye impressions and use a tool to define a brow line above each eye
Form the nose with a small piece of triangle shaped clay and adhere to the hose area between the eyes.Use fingers or small flat clay tool for this. Sooth all edges with water. You can use water as you work to keep the piece smooth, and smooth over any areas that may become damaged. Use the sharp end of a pencil or pointed clay tool to define the nostrils.
The mouth will be painted on, so leave that area smooth.
Insert the animal eyes into the sockets, make sure the shank if pushed firmly through the clay and into the Styrofoam.
Use a spoon shaped clay tool or end of large paint brush to make downward eye impressions in the Styrofoam egg. Make a depression in the nose bridge between the eyes area as well.
Use paintbrush handle or clay tool to ream out an area at back of head, just above the chin area. The neck tab of the body will be inserted here later.
Roll out a golf ball size piece of the clay on a mat using a clay roller, or the edge of a jar. Roll to about 1/8" thick.
Cover the entire head except the hole in back with the Paperclay. Trim off excess if needed, or add more for coverage. Dip fingers in water to smooth the entire head.
Define the eye impressions and use a tool to define a brow line above each eye
Form the nose with a small piece of triangle shaped clay and adhere to the hose area between the eyes.Use fingers or small flat clay tool for this. Sooth all edges with water. You can use water as you work to keep the piece smooth, and smooth over any areas that may become damaged. Use the sharp end of a pencil or pointed clay tool to define the nostrils.
The mouth will be painted on, so leave that area smooth.
Insert the animal eyes into the sockets, make sure the shank if pushed firmly through the clay and into the Styrofoam.
Allow the head to air dry or 24 hours, or dry it in the oven set at 170o temp for about 1 1/2 hr. Do not set the oven thermostat any higher or the eyes and foam may melt.
When the head is dry, Sand lightly if there is any roughness to the piece. Apply 2 coats of gesso, allowing to dry in between, and sand after each coat if necessary. Paint the eyes sockets and black. You can remove the eyes or put masking tape over them as to not get any paint on them. Mix the black paint with some white to make gray, and shade the nose bridge area. Paint the eyebrows bray, and inside of nostrils black. You can use the black pencil for the nostrils.
Draw a mouth with the black colored pencil, outline the center line as well. Paint the lips gray.
THE BODY
MATERIALS
15"X 8" White cotton fabric
15" length of small gage wire
Floral tape, or masking take
2 strips of white cotton fabric to cover arms, 1/2" wide by 12" long each. Gauze tape works well if you have it, or cheese cloth.
Tacky glue
Wire cutters and hemostats
Stuffing
Needle and thread to match fabric.
+++++++++++++++++++++++++++++++++++++++++++++
Copy onto paper and cutout the pattern below from freezer paper to make a template for body, and iron onto doubled body fabric. Note the dimensions. Sew around the template, leave open at bottom for stuffing.
Poke the wire in at one shoulder, and out the other side, Make both wires even. Then use hemostats to push the middle of the wire up into the neck. Bend over the ends with hemostats to form the hands.
Use hemostats to stuff the body firmly. Make sure the neck is firmly stuffed especially. Stuff to 1" of bottom opening and sew a gathering stitch to close, tie off the thread.
Wrap tightly the wire with floral tape or masking tape. Apply tacky glue to the arms and wrap the fabric strips tightly around the arms. Make sure hands are covered, and no tape shows through.
THE DRESS
MATERIALS
Black synthetic fabric, 1/4 Yd. Choose a fabric that is lightweight, but not transparent. Polyester crepe works well, or any black lightweight fabric that is not transparent. The fabric must be synthetic.
Candle
Black thread and hand sewing needle.
+++++++++++++++++++++++++++++++++++++++++++++
For the skirt, cut a piece of the black fabric, approx 7" X 15"
Turn under and zig zag one 7" edge. Cut long 1/2"strips into the bottom of fabric, about 10" deep.
Light the candle and run the strips quickly across the flame. Make sure you seal the edges of strips in the flame to prevent raveling as well. Move the strips quickly above the candle flame, but not directly into the flame, until the fabric starts to pucker and shrivel. If a few small holes appear, that is ok, but take care not to sever the strips with the flame. You can burn a few small holes in the bodice area if you wish. Use a well ventilated area, and pollen mask if you are sensitive to fumes.
After all strips are treated in the flame, sew up the back edge of fabric, up to top edge with small seam. Trim with pinking shears.
Put dress on doll and hand gather top edge, and anchor it to the doll's body. Take a few hand stitches at each side of waist.
SLEEVES
Cut two 3" X 9" pieces of fabric for the sleeves. Turn under narrowly the top edge of each sleeve and zig zag on machine. Slit the bottom edge up to about 5" from top edge with 1/2" strips. Repeat the candle process for the sleeve strips. Sew closed the top 4" with narrow seam and trim seam. Put the sleeve on doll's arm and hand gather top edge, anchoring it here and there to the shoulder. Repeat for other sleeve.
Apply tacky glue to neck tab, and inside the hollowed out area of the head. Insert head firmly onto the neck tab. Wipe off any excess glue.
Glue on hair material of your choice, I used Tibetan wool on my doll. I added a little white cheesecloth at her waist, stiffened with fabric stiffener for an accent. Sew a ring onto her back for hanging, or suspend her from a length of elastic thread.
I had so much fun designing Goulianne, and I hope you enjoy creating her as well!!


 t.
t.


 Use a spoon shaped clay tool or end of large paint brush to make downward eye impressions in the Styrofoam egg. Make a depression in the nose bridge between the eyes area as well.


